You might have guessed from my blog name, BackToPaper, that I ventured into the digital world too far and eventually found my way back to the tactile world of sweet, lovely paper. Indeed I was a digital junkie since age 14, chatting on IRC with friends and building my own blinky marquee type websites. I was a totally geek and started blogging and eventually got into all aspects of digital design. Years later, I just fell out of it all. Little time in college and even less time when I started working.

When being on the computer became a work activity, I yearned for off screen time. I turned to old fashioned crafting and handmade hobbies. Over time, I realized there was a need for balance. I love digital for so many reasons, but love the non-digital as well. Perhaps it is not surprising that my scrapbooking is hybrid to the core. Nowadays, isn’t it always hybrid with printing digital photos and journaling? But why not take it a step further and print your own pattern paper?
I’ve found that it’s really easy and simple to print all those beautiful digital scrapbooking papers you see – check out my shop! When it comes to printing at home, you need only to pay attention to a few things. A few tests later and you’ll be well on your way to hybrid scrapbooking.
Probably the most important aspect of printing at home, is choosing what paper you print on. Regular cardstock usually isn’t going to give you the vibrant colors you see on screen. I print all my papers on matte photo paper. It gives me the best color quality and it makes total sense, it’s for photos after all. See the two sheets of green chevron paper in my photo? The top sheet is on photo paper, the bottom on regular cardstock. Significant difference.

Check your printer settings! Many home printers have the option for borderless printing and custom sizes. This means you can print exactly what you need, not necessarily waste a whole sheet if you don’t need it. So remember to dig into those printer settings and options and check your paper size.
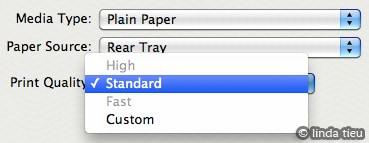
Print quality setting makes a huge difference in the final result. People seem to not believe there is a difference, but you usually don’t see it unless you print the same image using all the quality types. Then you can see the actual difference. It’s always best to use te highest quality possible! I’ve noticed that on certain types of paper settings, the high option is not possible for my printer. This actually makes sense, because without the proper paper, you aren’t going to see the results.

When the printer, ink, paper and settings are all in sync, you get the best possible result from your equipment. Probably the biggest tip, is to read the manual for your printer and figure out what it can do. You’ll be surprised… following directions actually helps. I’ve been printing my own patterned paper and loving the results and freedom it allows. If I need something, just print it, no need to run to the store!


