If you would like to learn about the Notes to Myself project from the beginning, check out the introduction post here. There’s also a freebie download below!
So the first step to creating my minibook was to decide on the structure. I’m not huge on planning when it comes to these types of projects, because it’s supposed to be fun and go-with-the-flow style. However, I did want to establish a few things for my foundation to make the process more approachable. Here are some elements to consider before starting your minibook…
Size and Format
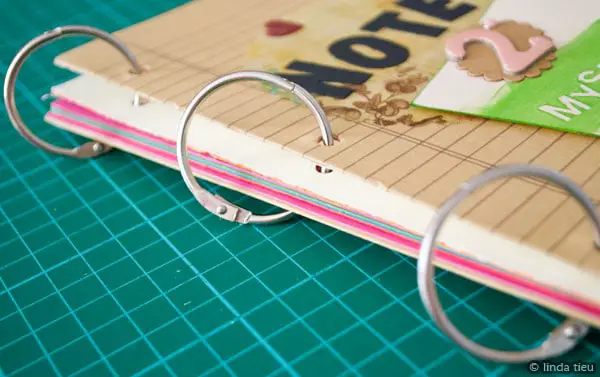
I decided to create a minibook because it’s handy for display, fun to create and fits my love for hybrid creations. I decided early on to use binding rings, as I plan to keep adding pages to this book as time goes on. Binding rings make it easy to manage something that is ongoing rather than a finite number of pages. The format will depend on what you want to create, how many pages, etc.
The size of my books are just regular pieces of paper folded in half. I don’t like to waste paper by cutting it down to a different size for no apparent reason…so my size is usually determined already by default. I am using thick cardstock for the pages, multi-colors even though in some cases they are entirely covered up by other pages that I glue on. I just like to have the cardstock as my base. Chipboard would definitely be more sturdy, but it depends how many pages you plan to have, might actually get too bulky. There are many options, so take a look and see what will work for you:
– use an existing chipboard minibook
– scrap regular layouts as you normally would
– digiscrap regular layouts and/or assuming you might want to print it out as a photobook at some point
– art journal pages randomly in your existing sketchbooks
– use a new journal for collage/journaling/drawing on this particular subject
It’s up to you how you want to approach this project, but deciding on a size and format gives you a foundation to start with and some boundaries to stay within. Without them I usually find myself changing my mind and getting lost in all the possibilities!
Templates
Once you have decided on the size and format, you might want to consider using certain templates. I’m using a super simple template for my journaling, so that it is consistent throughout. Really simple, spaced out text that I can print and cut to include directly into my book. I’ve chosen to journal on the computer, because handwriting would take forever – I know, everyone says they hate their handwriting! Even though I want to practice handwriting and get over it already, if it becomes an obstacle, then just type it and move on.
Think about how you might want to approach your pages, if you like consistency and want to formulate a template to stick to. Others might find this too constricting and choose to go for a free for all instead. However, you might still want to create a template for certain elements. Any photos you might use or the same set of journaling cards or a particular line of paper. It’s nice to decide on using something consistently, because that will make your pages look like they go together.
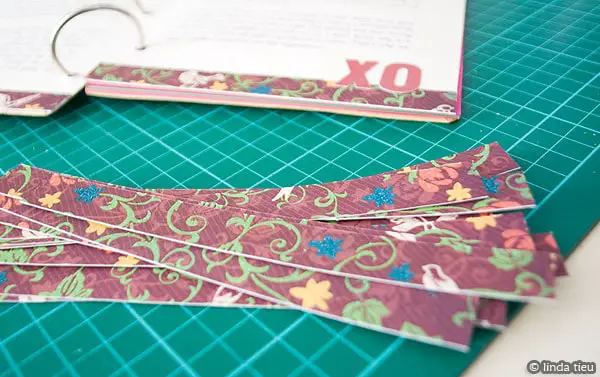
In my case, I’ve decided to cut little strips of patterned paper (from the DCWV Mi Casa line) to anchor all my text pages. It’s super simple, but adds foundation to the structure as well as color and embellishment, so it’s not so texty. I find this an especially nice trick to use for really heavy text pages, especially in minibooks that have less room to add much else. Adding a strip of pattern paper on the sides or the bottom gives that extra little umph needed. You can see that I’ve prepared a whole bunch of strips, ready to be added in.
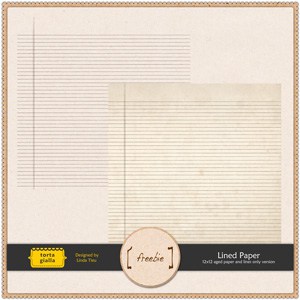
In addition, I’ve decided to use a lined paper design for the background of certain pages…it’s something I designed digitally and printed directly on some kraft paper. Later you will see I use it for my cover, so it’s something that will be consistent on my pages, even though I’m just using it as a background, not actually to journal on. You can download the design for your own personal use as well – I made it 12×12 to work for digiscrappers. There’s the aged version to make it look like old distressed paper or use the lines only version to print onto your own kraft paper or cardstock! Enjoy!
So think about what you would want a template for and set it up now. This will create consistency for your entire book and make it a smoother process. Things to consider include:
– template for the page layout
– template for journaling blocks/styles
– template size for photos or a few different grid formats to use
– consistent style of paper, elements, date embellishments, etc that you might want to consider using throughout
– or go free for all if that’s your style!
The Cover
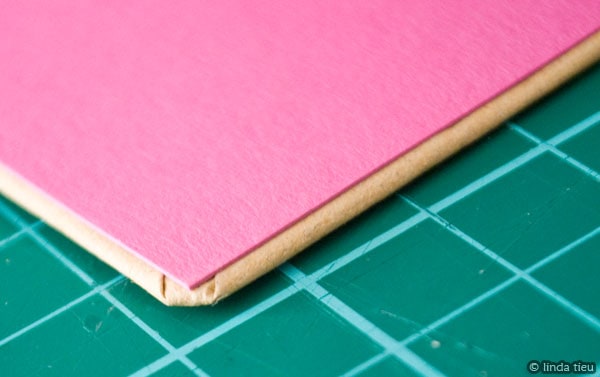
Many times I create the cover of a book last. However, for this project I already had something in mind and since it’s an ongoing project – I won’t know when the last page will be done! So I went ahead and created my cover first. To make the front and back cover stronger, I just folded a piece of cardstock in half and used it doubled-up as one piece, since I don’t have any chipboard handy. You can see on the back cover that I simply wrapped one side with kraft paper, folded over the edges, then lined the inside with cardstock to clean it up. I know some folks are intimidated by any kind of bookmaking process, but it is really easy to cover up cardboard or chipboard with patterned paper. Many scrapbookers just cut patterned paper to size and glue it directly on chipboard, then paint or ink up the side edges. I like the wrapping method instead, but both methods work to add strength and color to your covers.
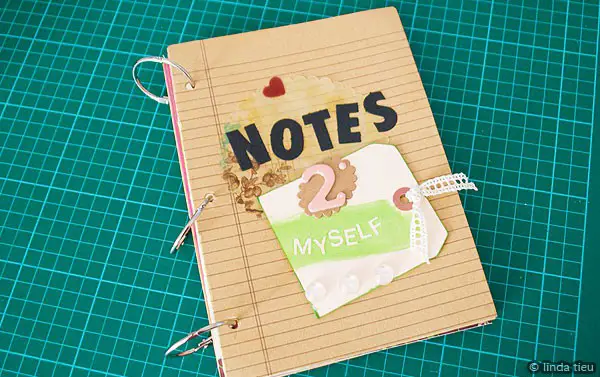
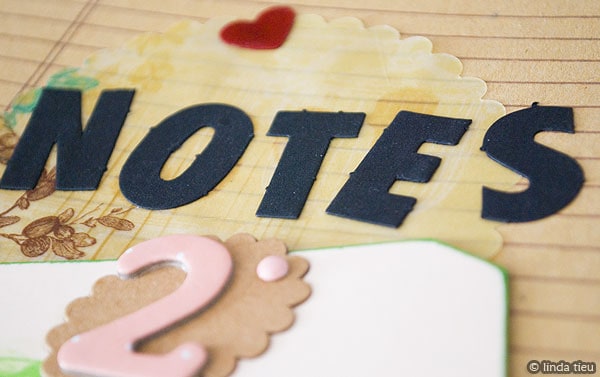
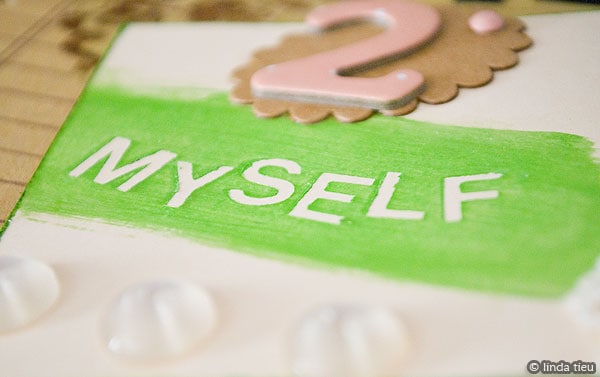
For my front cover, I’ve used the lined paper design I mentioned previously. Then I decided to group a bunch of elements together to create the title. You can see there is a die-cut circular transparency in the back, with punch out black letters spelling “notes.” Then I cut a tag to a smaller size, used letter stickers to mask off an area then painted with green on top. That’s how I created the word “myself.” I usually don’t get too dimensional with my projects, but on the covers I can add little things here and there without worrying about embellishments digging into other pages. Still pretty minimal though – I realize some folks love to add lots of embellishments. Definitely go with your style!
Of course, nothing ever has to be finished…at some point I might add something else if I feel like it…but for now that’s the cover!
Book Introduction
When I create a themed book, I like to include an introduction of sorts to explain what the book is all about or what my motivations are. Since I’ve blogged about this project, it was even easier to just copy paste what I’ve written into my text page template and print it out to include as an introduction. Totally simple, full text pages to explain what I’m creating…and you can see I’ve added my foundation strips of patterned paper to the bottom.
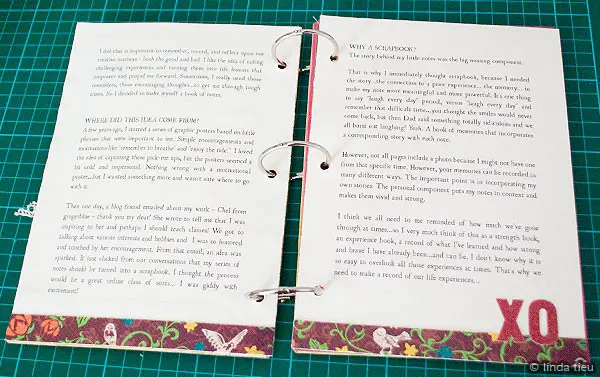
In addition, I’ve added in an embellishment here with the “xo.” Whenever there is an open space, I can fill it in with embellishment. Having the element overlap the foundation strip keeps it grounded, rather than just throwing something that floats in open space. It’s simple, but effective! Of course, you don’t have to include an introduction at all…or perhaps you might want to create something a bit more artsy. It’s up to you to decide on the approach that matches your style and what you might have to say. This project is about notes to myself, to help me remember wise words of wisdom. So I wanted to explain that in the beginning of the book.

Now that I have my book ready, I can begin to put the various pages together. I will be presenting one page at a time or actually a spread or two at a time for each “note to myself.” Now is a good time to jot down some notes to yourself, so you have a list to go by…and start journaling about them. Getting the story down on words will help you to decide on including photos or not, what colors you might use, which embellishments… everything really. Here are some of my notes…
– Enjoy The Ride
– Just Breathe
– Time Will Heal
– Laugh Everyday
– Put a Smile on Your Face
– Chase Your Dreams
– Patience is a Virtue
– If at first you don’t succeed, try, try, again
– It’s okay to cry
– Celebrate success
You can find lots of beautiful quotes to use as well at ThinkExist… and of course, I think for scrappers it will be easy to capture phrases that blossom out into a story for you. It can be a very personal thing, that might not mean much to those who don’t know the story. Like if I had a title, “mucho…” as a note to myself…it’s sort of cryptic, but means a lot to me. I think at times it’s the title of many scrapbook pages. So let’s do some brainstorming and I’ll be back to share each of my pages…
If you have any questions at all, please comment away – thanks for joining me on this journey!

