by Linda | Oct 5, 2011 | my creative journal
Search Engine Optimization or SEO is a term that usually scares most people away. It’s that complicated techy nerd stuff and I agree that most of us don’t have time to fiddle around with. That’s exactly the reason why you should learn the basics and work it into the best practices of how you communicate online…because your time is so precious.

In reality, SEO is not rocket science…in fact, we know that technology changes constantly and there is no exact science to SEO. Optimization simply means you are striving for the most effective result and I think it’s a way of doing things in general – that is why I say SEO is good sense.
We all go to a search engine like Google and search for the information we are looking for. SEO is an attempt to make your content show up when people are searching for it. Of course, there are tricks out there and methods to push your website up the ranks, but the search engines can readily change their algorithms and scoring methods. In fact, it happens a lot and many of the tricks no longer work and sites lose ranking that they spent a lot of time tinkering around to create.
What doesn’t change is the fact that search engines are trying to give the people what they want. If someone wants to find a plumber in San Francisco, it’s pretty clear what they expect the search engine to list for them. So ultimately, as a creative entrepreneur, artist, whatever your business…you want people to find you when it pertains to your business. In the crafting world, a whole lot of people get traffic from posting tutorials because it’s exactly something someone would search for – “how to make” or “how to sew” something.
So what best practices do you need to pay attention to when it comes to SEO for your small business?
- Write for humans. Tips and tricks aren’t going to last…ultimately, you want people to consume your content, so write for real people reading your content.
- Use descriptive titles and sections. I know sometimes we want to be clever or cryptic with our titles and it’s okay for the occasional blog post, especially when it is something cryptic or personal. But if you are writing a tutorial or article about a specific topic, please title it properly. Don’t unnecessarily confuse readers or lead them astray.
- Try to be descriptive with your image file names and add those captions, alt and title tags as well. Again, it’s just goes back to being clear about your content. If someone happens to link directly to your image, will they have any idea what it’s all about? I get lazy with these things as well, but at least try to do it for those posts that are meant to attract users like tutorials and information articles.
- WordPress users, I recommend the All in One SEO Pack to ensure your basic meta tags are in place.
- WordPress users should change the default permalink structure. Basically, when someone goes your blog post, do they see cryptic numbers and symbols in the address bar? That doesn’t help anyone. It’s so much better to have the category, the postname or some combination that makes sense to a human reader. Again, it’s just good sense!
Although I’ve learned many tips and tricks in SEO for building websites, the ultimate goal is really about being clear with your content. If you do a good job with that in mind, keeping everything as clear and descriptive as possible…you are doing a service to your readers in general…not just trying to boost your rankings. The icing is that your content will naturally be optimized. Remember that you are not competing with the big shots who have the money to hire a team of SEO specialists…because yes, there are people who’s sole responsibility in their job is optimize a website, manage paid campaigns and all that jazz.
If you are interested in learning more about SEO, blogseo is filled with informative articles.
by Linda | Jun 23, 2011 | my creative journal
Many blog for the joy of sharing and writing, but when it comes to your creative business, your blog is an important marketing tool. Ultimately, you need to get in front of people’s eyes, so the right people can find you and fall in love with you. Great products, services and content keep people coming back, but driving new traffic to your blog is essential as well. Otherwise, you won’t get new readers to continue growing your audience.
So here enters the giveaway – one of the many marketing promotions used by bloggers. It is meant to attract lots of people given the FREE aspect, but are you really accomplishing something? I’ve been trying to understand how one goes about a giveaway and if they truly work as a marketing tool. Of course, I understand that many giveaways are about giving back to your current readers…sort of like a thank you or perhaps a pay-it-forward idea. But I’m talking about using giveaways as a business tool.
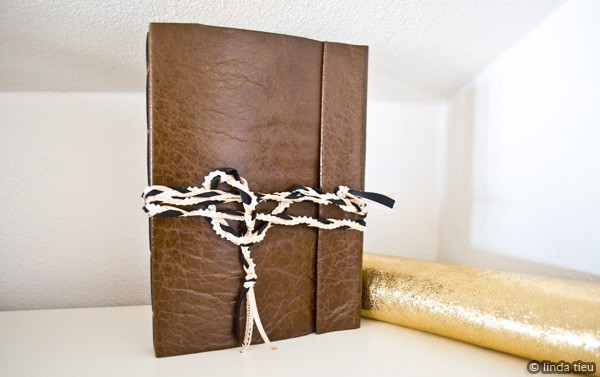 I’ve experimented with giveaways in the past
There’s no doubt that giveaways attract people. I’ve had experience in getting a huge boost in traffic and so many more comments than usual. But sometimes I think you are attracting the wrong people. After all, there are websites dedicated to simply listing giveaways online. I’m pretty sure there are crawlers out there who enter all of them and win just by sheer volume and chance. It doesn’t seem like a giveaway would attract the right people. In fact, it sort of runs into the subject of free stuff and how offering lots of free, actually dilutes your audience. I know that Sister Diane has blogged a lot about the topic and it’s definitely something I wrestle with.
If you are trying to make a business out of your creative work, getting an audience of people who are only looking for free stuff doesn’t work! Certainly there’s something to be said about community participation and the sharing of ideas, so it’s not all about sales. But ultimately, you do have to find potential customers…otherwise your business isn’t a business.
In my opinion, I think giveaways do work, to a certain extent. If you think about advertising in general, there’s the idea of brand advertising. You are just getting your brand out there and more known in the community. So you aren’t pushing a specific product with your advertising, you are just saying here I am and I’m kick ass because of xyz. This plants a seed…so when people actually need your particular product or service, they will say – hey, I have heard of them before…and hopefully it leads to sales.
So giveaways do help in the brand advertising department…but you have to realize that posting on your blog alone, will mostly attract the “I want free people” and your current readers. You have to do a lot of promotion to get brand new people into the game. That’s why many folks do a giveaway on someone else’s blog. You auotmatically get the brand advertising with a whole different audience. In a way, it is like partnering up with another business…because you might have a common audience.
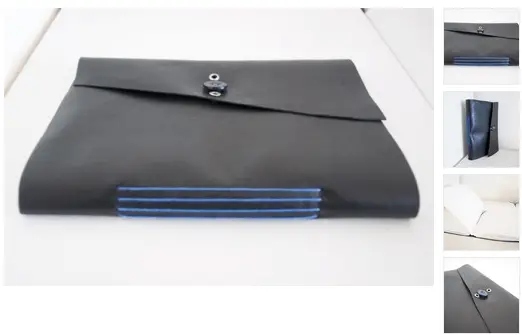 I’ve joined giveaway events – reaching really huge audiences
But what if you want more? This is when a giveway is coupled with a product review or hook to sign-up or get connected in some way. When you include a product review, you are in fact trying to “sell” a particular something…usually what you are giving away. No doubt that if someone really wants the product, they’ll just buy it directly. So you get the branding and the sales offer.
In addition, if you ask people to follow you in some way, then the connection has started. Although you might not retain all those people – many just subscribe and unsubscribe from newsletters for example – you will still get a certain amount of new eyes following you in the end. I think you have to realize that it is okay to say goodbye to the people who are uninterested. They aren’t your people, afterall.
So I think giveaways work, but to maximize the potential you should try to hit all options available to you and get the most out of your effort. If your goal is to attract a new audience and potential customers, you need to reach a new audience, introduce something specific and get people hooked in some way.
What do you think about giveaways? Have your experiences been positive or negative? Do you track the success (or failure) of your giveaway?
by Linda | Jun 17, 2011 | my creative journal
I’m probably not the first person to have fallen in love with Copics before truly understanding how it all works.
I had first been exposed to the Copic brand through the manga community and used their black multiliner pens for drawing. But after seeing the beautiful coloring techniques of many cardmakers and scrapbookers – I really wanted to dive in myself! But going on a whim, I bought a few sets of Ciao markers that I saw at the art store…which turns out to be a bad approach to buying these types of markers. Now I have a mix of colors that do not necessarily go together so easily. However, I don’t think you MUST buy the various shades within a color family in order to make use of Copics. It ultimately depends on how you plan to use them and if possible, you should try them out at a friend’s place or do a bit of research to see what you prefer.
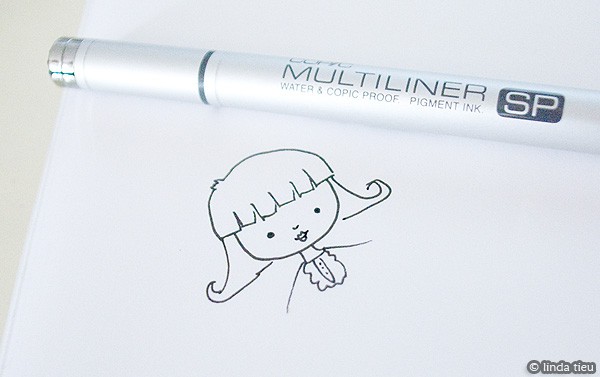
If there is a certified instructor or a presentation going on about Copics at a store, you should definitely attend.
They basically go through the foundations, so that you understand the color system and how Copics are used, usually with demos right there in front of you. Then you will be able to make an informed decision when purchasing. There’s a video by Scrapbook.com about Copics that gives you some basic information about the markers. I love Copics because they are refillable. It’s basically in the vein of buying something of quality that you can keep using, replacing only the consumable parts. Even the Multiliners are now refillable! Finally, the most important thing is to learn the Copic color system and what it all means. Those letters and numbers are very important and you should not just go by the cap color.
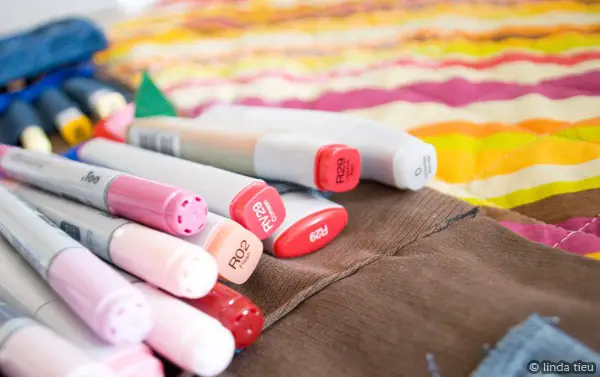
The FAQ on the Copic website explains the color system and if someone explains in person it will make more sense, I think. After I finally got it straight in my head, I realized that buying markers in sets of 3 per color makes a whole lot of sense. You basically want markers in the same color family and same first digit for the same saturation level. Lower numbers are more vibrant and higher numbers get more dull or grayed out… the final number is for the lightness or darkness – that’s why crafters buy sets with the last digit just 2-3 away from each other. For example, if you want to create a blended blue-green color, you might buy BG01 (lightest color), BG05 (mid-tone) and BG09 (strong shadow). Those three markers would allow you to blend it all nicely to get the gradation. This really does mean that for each color, you should have the markers to cover the light, mid-tone and dark range. For crafters, I think suzannejdean is one of the most popular on YouTube. She shows you how she colors super cute digital stamp images with the exact marker colors she uses.
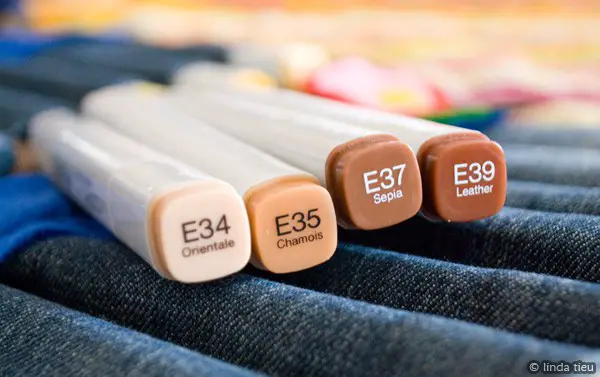
However, I should note that the multiple shades in the same color family isn’t the only way to use Copics.
In fact, if you learn from a manga artist…they don’t actually use those rules of buying markers. Think of paints that an artist might buy…a teacher might recommend a palette to beginners, but everyone develops their own preferences in the use of color. Same with Copics. In fact, I also just like Copics as markers without any blending. They are just kick ass markers!
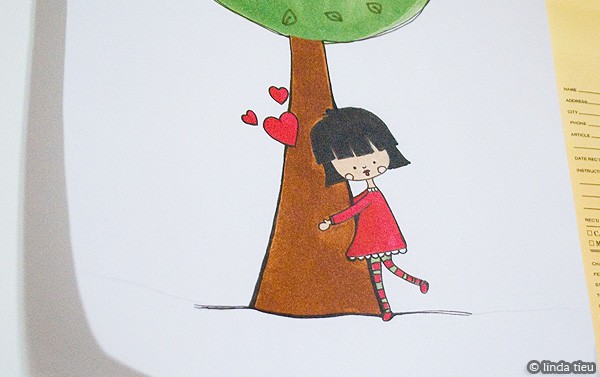
And as with anything tool, the more experience you have the better you are at using it. From the manga world, we learn that you can apply blending solution to your paper first to create a wet surface to work on…think watercolor techniques…only it’s alcohol and dries a lot faster. You can feather different colors into each other, layer on top various colors to mix and use an external palette. In fact, you can buy empty copic pens and use the various color refills to mix your own colors. I know, getting complicated. The point is to say the markers are powerful tools…like any other artist medium.
Some tips I’ve learned from attending a presentation and my own experience…
You really can use any kind of heavy paper. This goes back to the old saying of how the tools don’t totally matter…in the hands of a master, regular heavyweight copy paper was colored on beautifully! Copic still bleeds through, that is part of how the marker is used…so just make sure to have backing scrap paper when you color. Otherwise the non bleedproof papers by Copic are super thin, but have a coating on the back to try and prevent bleedthroughs. I say try because it does depend on how heavy handed you are. If you try to make it bleed, you can!
Try not oversaturate your paper, keep a light touch! I know many tutorials tell you to saturate the paper, but going overboard is what causes all the bleeding out of lines. Practicing with the paper will help you get a hang of how much ink to apply.
Copics can be used on many different surfaces, not just paper…so extremely versatile type of marker.
You can blend completely different colors!
You can use the marker directly, use your blender pen and touching it to the marker tips to get only a bit of color or create your own external palette by putting colors on a plastic sheet.
Another thing I saw, were artists putting down the colorless blender first then feathering strokes on top. They kept using the blender to smooth out edges, leaving white space as well, not necessarily coloring every spot in. The brush tip is used just like a paintbrush.
You can leave the white of the paper for highlights or use white paint, white gel pens or even white out to add touches of highlights to your final work.
The colorless blender refill can be dropped onto color to create cool effects – very much like alcohol drops on acrylic paint. Suffice to say, there’s lots to explore.

I found more videos of crafters who use Copic and you can see a different style here and here. You can also find out more information and updated color charts at the Copic Marker website. I’m still learning a lot, but found that after meeting instructors and seeing demos finally felt more confident in purchasing. Hope I’ve provided some helpful information to spread the Copic Love! If there are ever certification classes here in Italy, I would jump for it immediately. Copic coloring is super fun whether you like the blending methods or just plain coloring!
by Linda | Oct 25, 2010 | my creative journal
Welcome, welcome to the start of my A-Z art journaling adventure! I posted about being accountable to myself and just wanted to do this little project for me personally, giving myself time to play and reflect…because I feel that it’s really important to nurture our personal projects – whether a concrete goal or just fanciful thoughts. With everything going on in our busy lives, sometimes it’s hard to make time to just creatively play. We all want to do certain things, but consider creative play an extra rather than part of our schedules. I decided to schedule time for my art journaling, because it is important to me and deserves to be a priority. Each weekday I’m going to journal on a topic around a chosen word, as I go through the alphabet A-Z. I like having that bit of structure as well as the beginning and end to this little idea. This will go on through November for Art Every Day Month as well…join me if you’d like to play along! So to begin I spent today making my journal and decorating the cover.
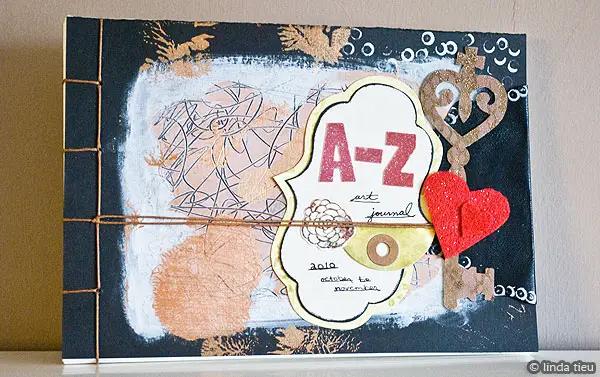
I didn’t have anything in mind and just went with my whim for everything. Sometimes we overplan and it’s just not as fun anymore…so I really want to get free and go crazy with this project. Go with the flow and just see what happens. I’ve been trying to organize and clean my space as well, so really trying to use all the bits and bobs I already have rather than buying more supplies. It’s so easy to forget that you have something in supply already! So I decide to go with a half-page size journal, not too ambitious to ensure I could finish a page a day.
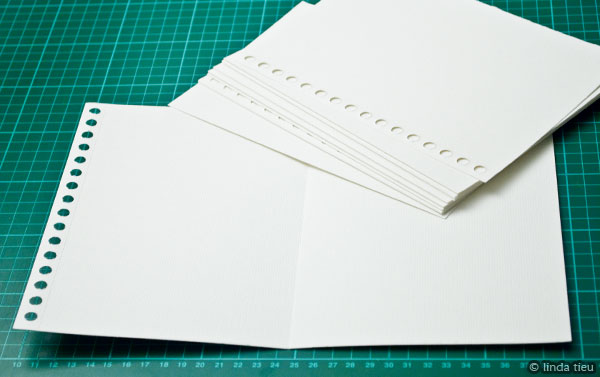
Taking some watercolor paper I already had lying around, I took it out of the binding and just ripped each sheet in half, enough for the entire alphabet. I actually really like the circle part, so just left that in as part of the paper of my journal. Adds a bit of detail and texture already!
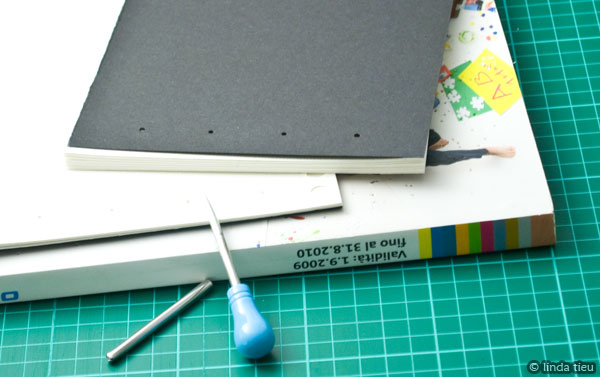
I poked my holes with an awl and just bound it together using the Japanese stab binding technique. You can find a lot of tutorials online and it’s super easy. I just sort of wing it…whatever holds it all together.
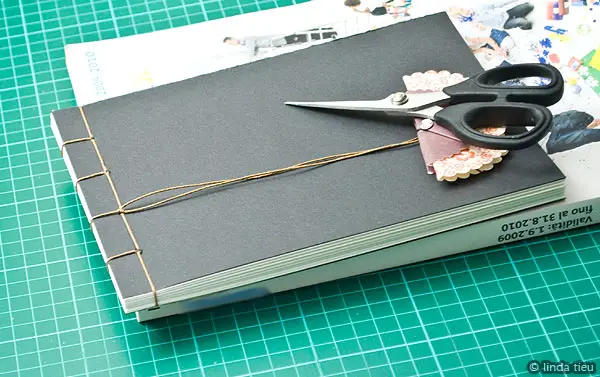
I ended up with an even number of holes, so the ends of the strings didn’t end up in the middle, but instead of trying to hide it on the back, I thought it would be great to incorporate into the cover of my journal. I painted with acrylic paint, scratched all over, added pieces of die-cut leather, felt hearts, paper cutouts and letter stickers for the titling. Just things I had lying around and quite happy with the results. I think sometimes if you just go with the process it’ll come out balanced in the end…no worries on perfect composition!
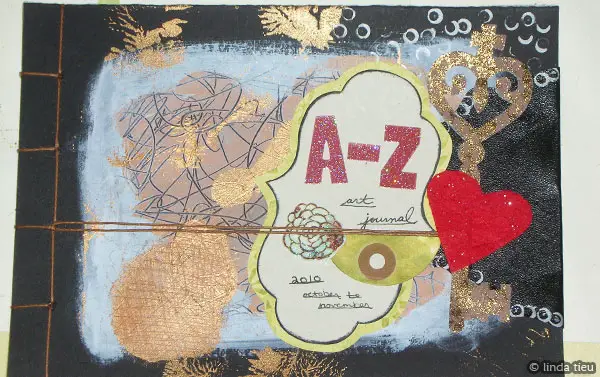
My favorite part is the messy painting and scratching parts. I just love the texture and sort of random natural forms…definitely fun, too! Here are so close-ups so you can see the details and that’s it for today. Just made the journal and decorated my cover to start with! Until tomorrow!
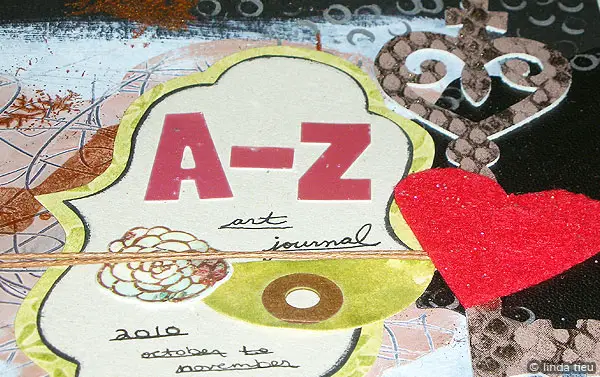
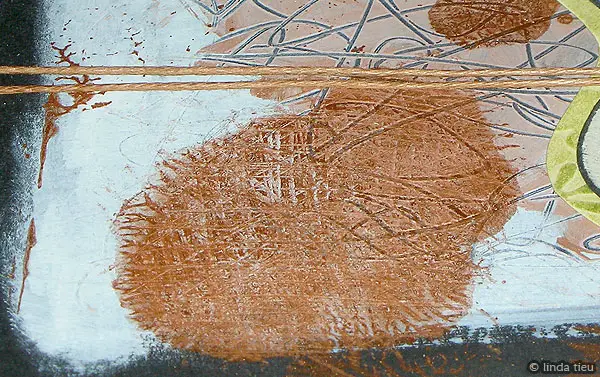
by Linda | Aug 16, 2010 | my creative journal
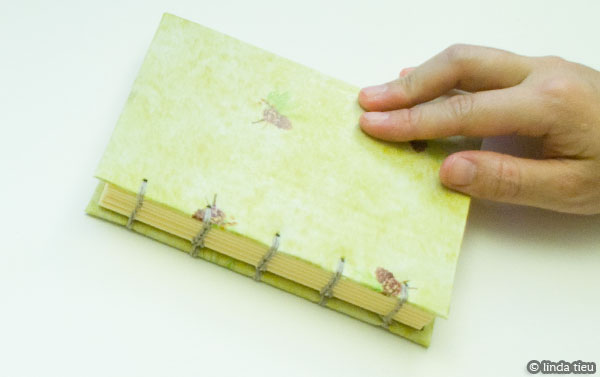
The coptic stitch bookbinding method is another way to bind your book with a spine that opens up completely, so you can lay your book flat.
Sometimes it’s also called chain stitch in bookbinding, but more often it’s called coptic stitch binding. I think it’s a great method for when you have book covers that are individual boards instead of completely wrapped around the entire journal spine area.
With coptic stitch you will bind all the signatures and covers together with one long thread and a connected stitch that holds everything together tightly, but still with a lot of flexibility.
The pages of your book will open up completely flat and that’s a big reason why this method is so popular. You might have seen these types of hand-bound journals around, because of the exposed stitching in the spine area. It looks pretty cool and although there are variations (as with everything) – this is my method of doing the coptic stitch with just one needle.
Bookbinding Materials Needed:
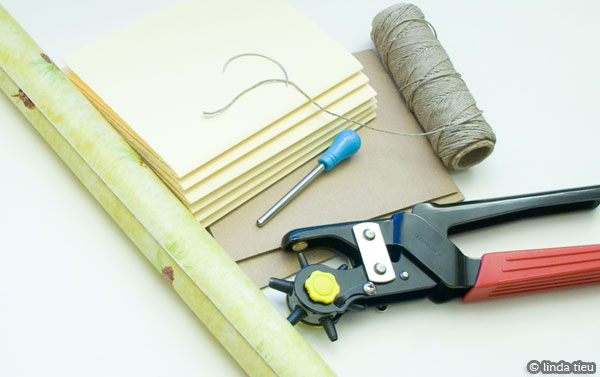
From a materials standpoint, your book is made up of the cover material, paper inside and the thread that holds it all together.
The tools you’ll need include a needle to sew your book together and an awl or something to help you punch holes.
For this particular journal, I’m using a roll of self-adhesive paper to cover regular cardboard for the covers.
The paper inside is plain cream colored printer paper and I’ll be using a curved needle with linen string. I also have an awl and holepuncher to make holes.
You can easily find coptic stitch bookbinding materials in your craft store or order them online. Here are links to the tools I have and they are pretty affordable – all available on Amazon. You can even buy a whole kit to start off with, giving you everything you need for bookbinding.
Please note there are affiliate links in this article that give me a slight commission if you click through and purchase at no extra cost to you. Thanks for supporting this blog!
Materials I use from Amazon:
Preparation:
Before you jump into sewing your book together, make sure you have all the materials and separate pieces prepared. The more accurately you prepare all the separate pieces, the easier it will be to complete the coptic stitch without too much frustration!
First, prepare your book covers. Usually you want a thicker material to protect the pages of your book, hence the use of cardboard or hardboard or bookboard. You can then cover the boards with fabric, leather, decorative papers. In the bookbinding world, you can also use bookcloth to cover the board, which is a flexible fabric material that you can glue over your covers.
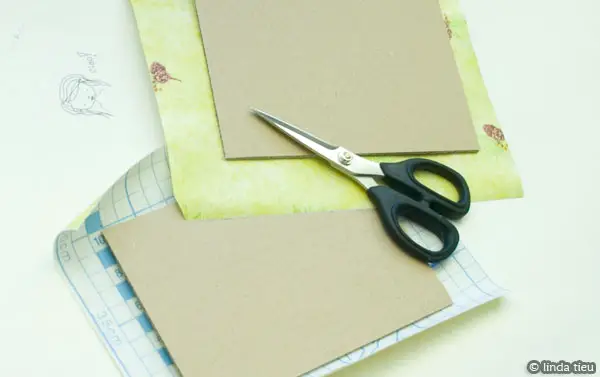
In my journal, I’m just using regular cardboard (which isn’t the strongest because it bends easily, so keep that in mind). Then I’m using a decorative paper that already has adhesive to cover the boards.
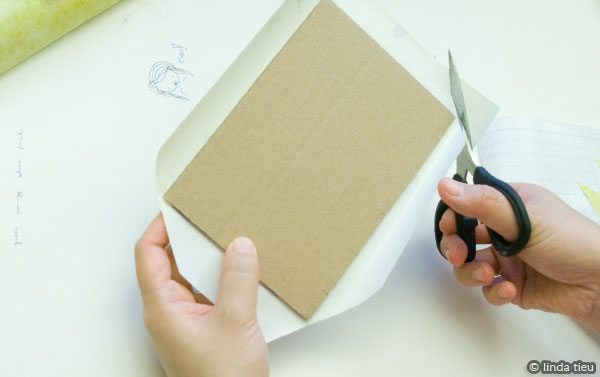
It’s a straightforward process of cutting the paper to size, gluing it to one side of the board. Trimming the excess corners and then folding over the edges and gluing them down.
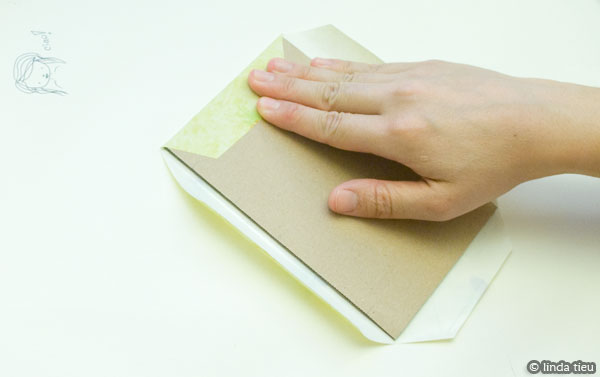
Finally, for the inside of the covers, I decided to use a dark brown paper as lining – to cover that final raw cardboard that shows. I find that it’s nice to add some kind of contrasting color for the lining of your covers, gives it a pop of color and something unexpected when you open your book.
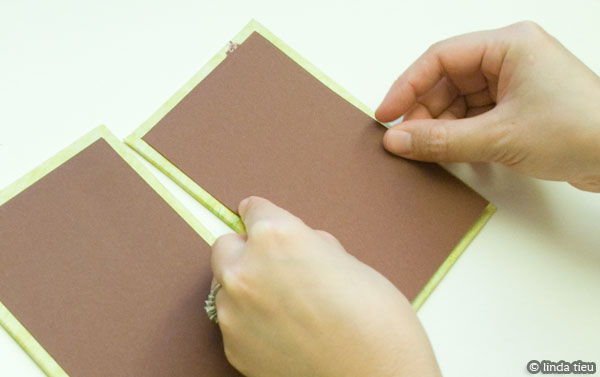
And with that I have prepared my covers for my book. However you would like to decorate your covers, make sure they are ready to go!
Then it’s a matter of choosing the paper you want inside your book and folding the papers to create your paper signatures. It’s up to you to decide how many pages you want and how many signatures you want (a signature is a bookbinding term for a stack of folded paper).
Now that my cover and paper signatures are ready, I punch all my holes to get them ready for binding.
Depending on the size of your book, it’s like creating pillars or foundations that are holding your book together. So just decide on the number of holes that will hold everything together without pages moving about.
Also, sometimes people choose more or less holes depending on how they want the spine to look. Because the coptic stitch is seen in the binding, it’s a cool design that you want to showcase. That’s also why you sometimes seem holes that are not evenly spaced, because someone chose to do that on purpose to create a cool design.
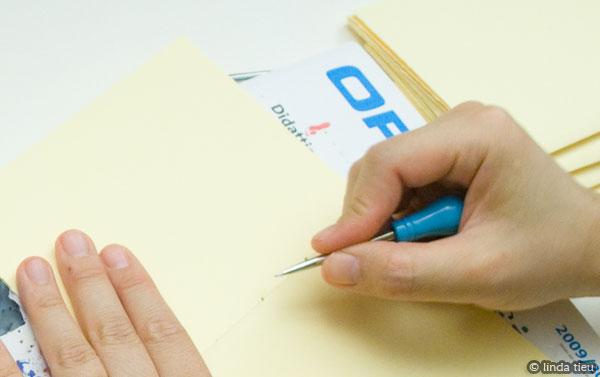
Just make sure you punch your holes in the same place for both covers and all your pages through the middle of the signatures. The key factor is to make sure they line up, so when you sew your book, it’s easy peasy and things don’t slide around.
It helps to mark your holes or create a template to mark all your holes on the cover and signatures, so you don’t make mistake.
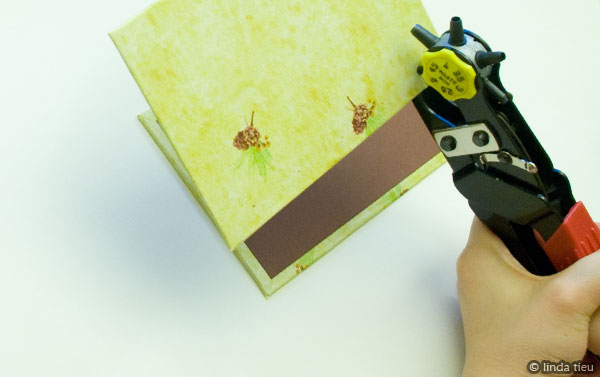
For the cover, I punch the holes using a heavy duty leather puncher. For the paper signatures, I punch holes in the center of the folded papers with my awl – using my guide to make sure everything is the same.
Remember that your holes don’t have to be gigantic when you punch them – just enough to get your needle and thread through. Obviously the larger you punch the holes the more you are weakening the paper… so just be careful!
Once all your materials are prepared, then you are ready to sew your book together using the coptic stitch method. It’s a pretty easy and straightforward process that is not difficult, it’s just learning a new pattern of stitching.
Also remember that you can have as many signatures as you would like in your book. Sometimes you see pretty huge and tall spines and the flexibility of this stitch makes it very movable and snake-like. I think it looks cool, but it might not be the most handy if you are wanting something practical to use. So keep that in mind!
Coptic Stitch Tutorial:
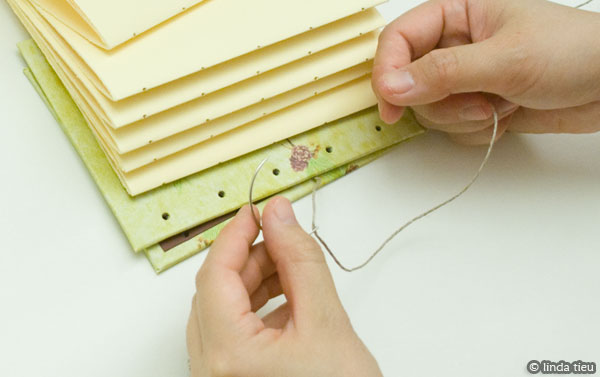
To start your coptic stitch, cut your thread in one long piece and string it through your needle to get ready to sew. Now it’s sometimes hard to estimate how much thread you will need. But you don’t want to run out, because tying knots half-way just makes it a harder process and weaker binding. But if your string is too long, you might get into trouble getting everything tangled up in knots as you work with it (hence why people like to use waxed thread that doesn’t get tangled).
One way to think about how much thread you need is definitely to measure out the whole length of your book and however signatures you have, because for sure you will have to sew up and down all the signatures of paper. Which coptic you are creating knots as well, so it’ll take up a bit more thread as well! There are some calculators out there but it makes my head hurt, so I just add more thread and keep things as neat as possible so the thread doesn’t get caught! As you make more books you’ll come up with your own way to measure out how much thread!
To start my coptic stitch, let me explain and show you in photos what I am doing. First, I put my cover down and the first signature to attache to it. I’m opening up my paper signature and starting with the bottom hole inside.
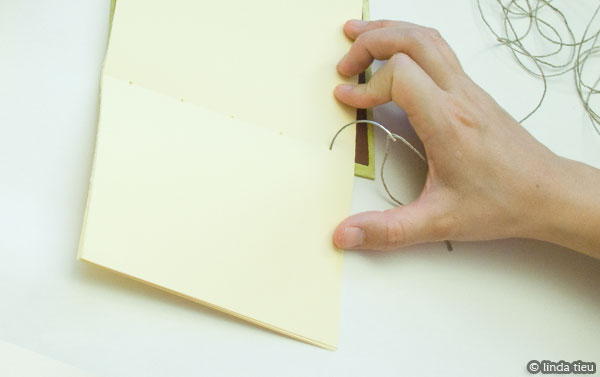
Bring the thread out and under the cover board to attach it to the signature…
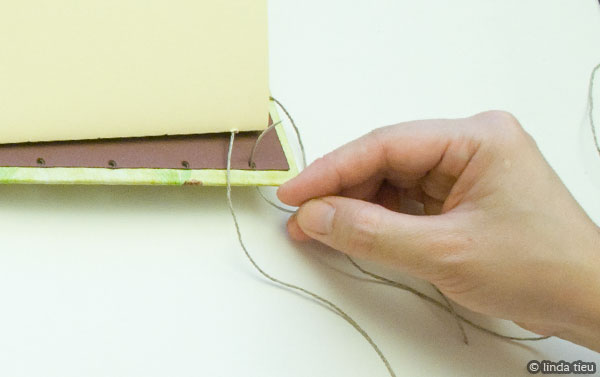
I like to wrap my thread around the cover board one more time, so it’s a double loop before putting my needle back into the signature bottom hole where I came from. This is just my personal preference. It depends how large your holes are, how delicate your paper is and how thick your thread is… so try it out in the future if you want to vary up your stitch designs.
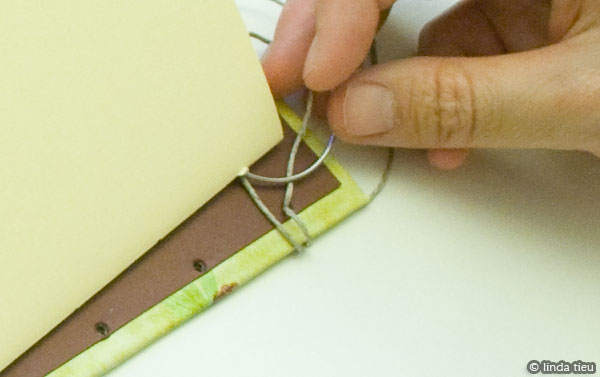
I make sure everything is tight and aligned, then tie a knot. The important part of this method of binding is keeping the cover and signatures on top all aligned…because that’s exactly how it’s going to end up in the end. You want a perfectly aligned stack of signatures on the covers, otherwise you’ll be sewing things in place all crooked. You can definitely use clips to help you hold papers in place.
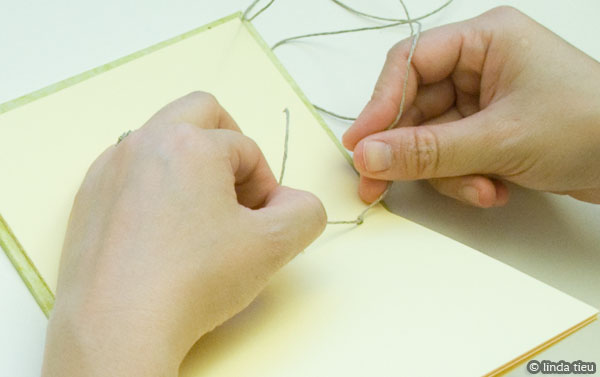
From this point, I just move up one hole and repeat the process of looping around the cover and coming back up. Only difference is that there is no knot to tie, you just keep looping through to attach the signature to the cover.
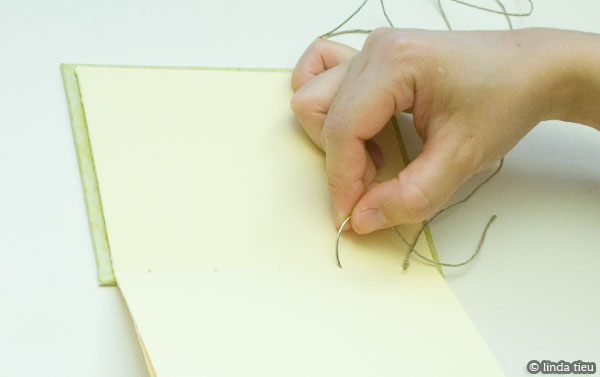
When you get to the last hole, after looping onto the cover, instead of going back into the same signature you stack on another signature and go into that hole.
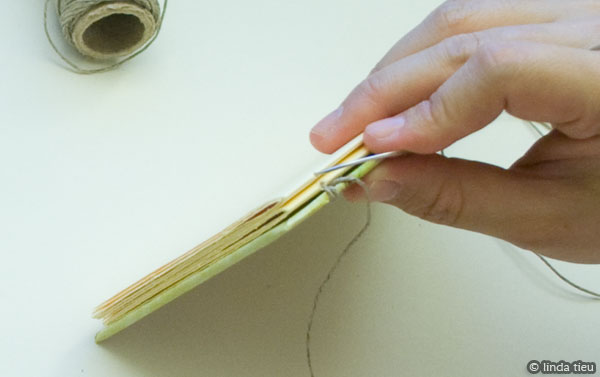
See how I’ve come up from the top hole in my second signature here…then I immediately go to the next hole…
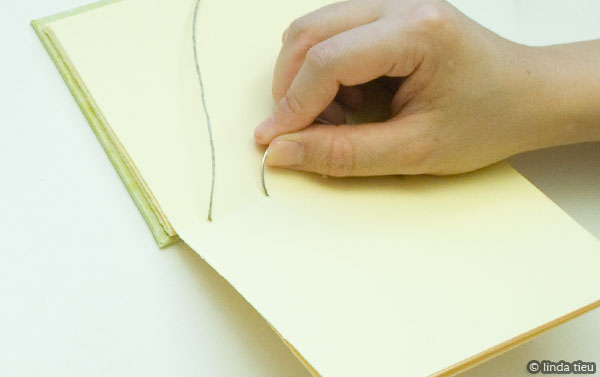
…and on the outside I want to attach this signature to something, but there are no holes to go through like with the cover. Instead I loop my thread in between the signatures below it, in this case the first signature and cover. Just stick your needle into the left side of the stitch already there and exit to the right of it.
This is a kettle stitch that connects the stitches together and creates the cool pattern on the binding. It is for this stitch that I use the curved needle, because it’s so much easier to stitch it in between the signatures when you have a curved needle to loop around.
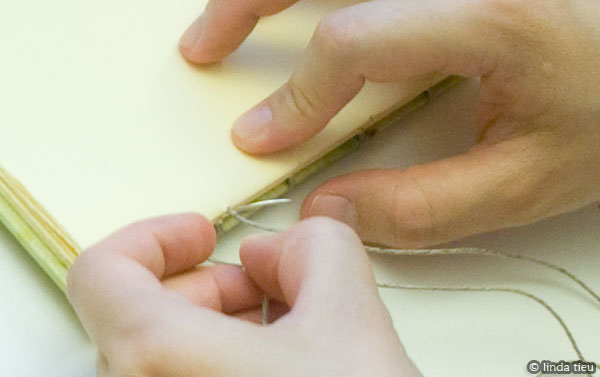
Here’s a close-up of the needle pulling the thread behind the existing stitch of previous signatures, from the left side to the right side. You are making a little loop to basically connect the new signature to the rest of the book.
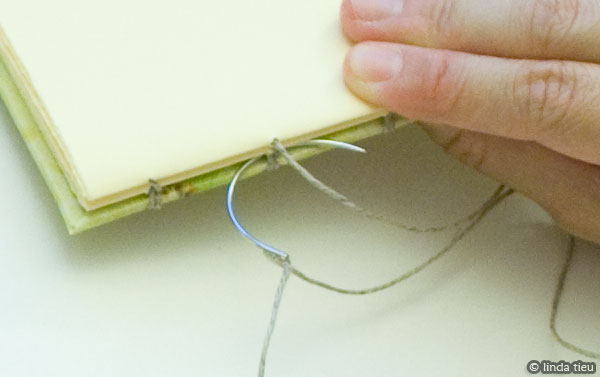
Once you’ve made this loop, the kettle stitch, and tightened the thread, you stick the needle back into the hole you came from and repeat going down the line of holes.
Remember when you are sewing the thread back into a hole you have already used, do not pierce through the thread that is already there. That would be cutting through your thread and making it weaker. Just put them next to each like friends!
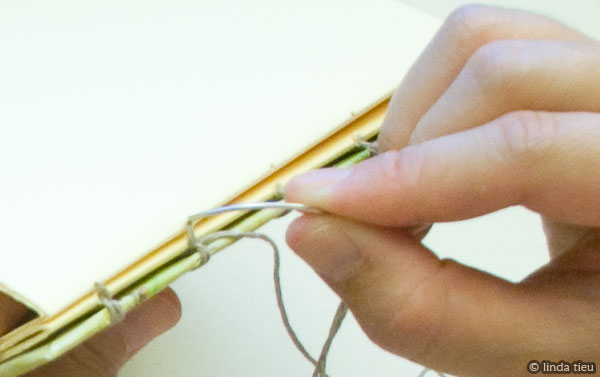
So repeat the process until you go through all the holes of this signature (basically connecting it to the stack you have… and when you get to the last hole, after doing the kettle stitch instead of going into that same hole again, you add another signature and go all the way up to that new signature bottom hole.
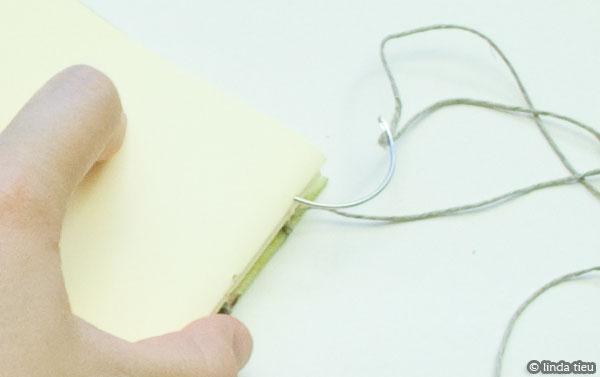
Then repeat the whole process, again and again until you attach all your paper signatures.
Once you get the idea, you’ll be able to continue for as many signatures as you have. You are basically attached your paper signatures one by one.
Now that I have added all 5 of my paper signatures, the final thing to do is to attach the cover.
I know there are ways of attached the final paper signature and cover at the same time, but I find it confusing, so my method is to just do the same thing with the final cover piece.
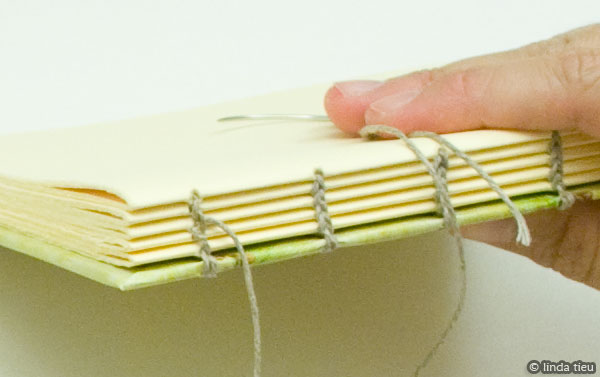
With just the cover left, I sort of do the same thing. But I weave through the last signature again, meaning it will have a double thread inside, but I don’t mind that at all for the ease of understanding this process.
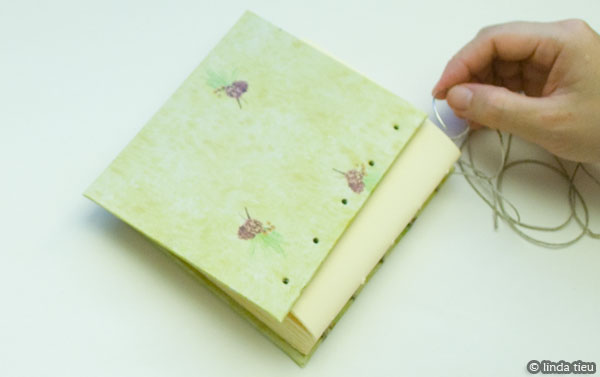
So going back to my last paper signature done and now having to add my cover. I do my double loop around the cover to match how I attached the front cover and do the kettle stitch to attach it securely to the book and then go back into the last signature of paper. I move up one hole and repeat the steps. It’s sort of doing the same thing, only attaching the cover back into the last paper signature.
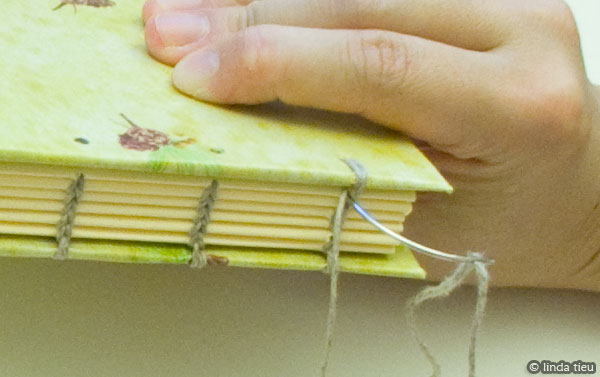
When I get to the last hole, instead of going back into the paper signature, I actually go in between the cover and paper signature.
I loop the thread around that stitch and tie a knot here to finish binding the book. One of these days I might learn another method that is cleaner, but this works nicely for me and the books I create are strong and don’t fall apart. So that’s good for me!
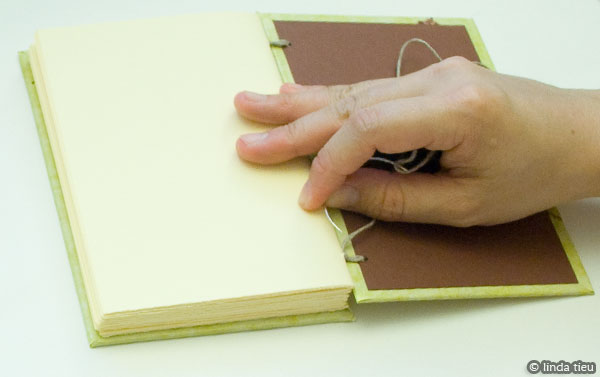
You’ll end up with a book that has a snazzy coptic stitch binding showing, very neat and secure. You’ll notice that the kettle stitches create a column of “v” or “u” looking pattern in the binding – which is very cool. The very left and right holes will look like half of that design, since it’s the edge.
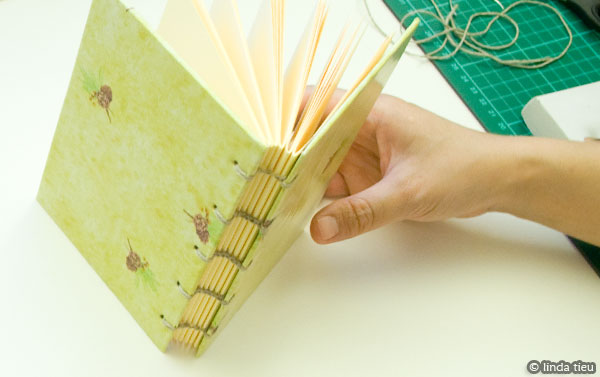
Now you can see how the book lies completely open when flat on a table… because of the way it is stitched together. That’s one of the big benefits of coptic stitch binding. You can see the entire page and most people find it great to write and work in because of this feature.
Of course, if you add too many paper signatures things may get imbalanced and unwieldy, so try it out a couple times, make a couple books and see what you like!
I hope this coptic stitch bookbinding tutorial was helpful – it’s my easy process of doing it with one needle!
I have also blogged about another chain stitched journal here and even though it looks cool, I’ve found it to be too fat. So that is the warning about giant books!
Too complicated still? You might want to try some other easy bookbinding tutorials I’ve written:
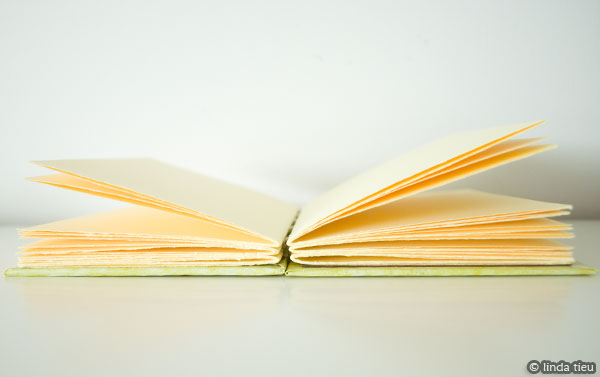
I like this kind of coptic stitch binding and find it cool, but I know it’s the easiest way ever. It does require precision and you want to make sure you tighten and keep things aligned as you sew the book up. Otherwise your signatures will be oddly hanging or crooked. I have even ended up tightening too much sometimes and the book doesn’t close completely because the thread is pulling on it… so beware!
You can of course, just put some paper weights on top of a finished book to even it out over time. The thread will stretch over time and use.
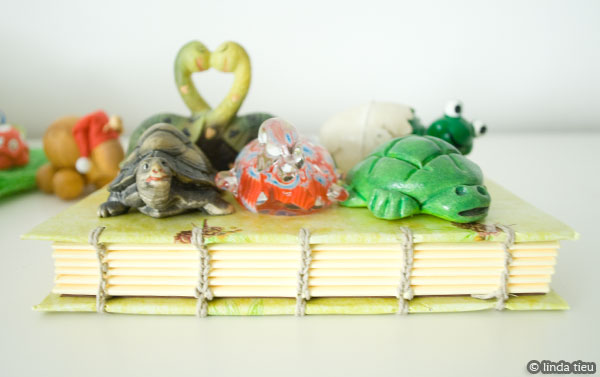
There are many other coptic and chain stitching tutorials out there, so don’t hesitate to find a youtube video that shows you the process in real-time or take a bookbinding course in person somewhere. It’s really the easiest way to learn, because you just have to dig in and try it for yourself!
DISCLAIMER: This post contains ads and affiliate links where applicable.
More Resources:
I wholeheartedly recommend CreativeBug (Get 3 months subscription for $1) because they have a coptic stitch tutorial as well and it’s very official by a professional bookbinder, so that is something to check out!
As with all things, once you try it a couple times, you’ll figure it out. So don’t hesitate! The results are satisfying for sure, so have fun!
Here are some bookbinding books on Amazon if you are looking to learn more:


